Filling in Dimensions
You use dimensions to describe elements uniformly in the Planner. In a dimension, for example, you can record which target group the marketing activity is aimed at. Dimensions are set up specifically for your system.If you have any questions, please contact your system administrator.
A dimension can be defined as a mandatory dimension. In this case, the dimension should be filled in for each element. You can recognize a mandatory dimension by the triangle  in front of its name on the Dimensions tab in the detailed view. A note below the table also draws your attention to the necessary editing.
In addition, the icon  may be displayed for a dimension. This means that a value has already been entered for the dimension and that this value has been inherited by the parent element. You can edit inherited values retroactively. When you edit an inherited value, the icon
  is displayed.
Dimensions can be of different types. The following sections explain the differences in editing.
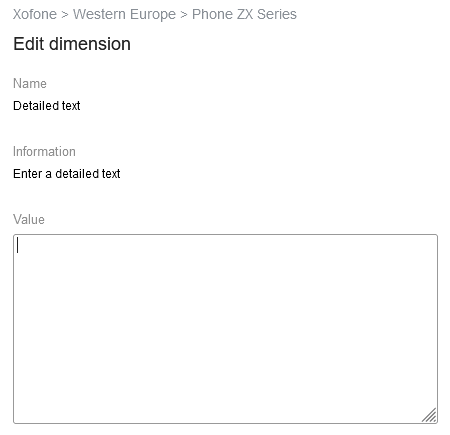
The screenshot shows a dimension where you enter text. Read the information where your administration may have entered interesting facts for you. The text field may possibly be limited to the input of 255 characters maximum.
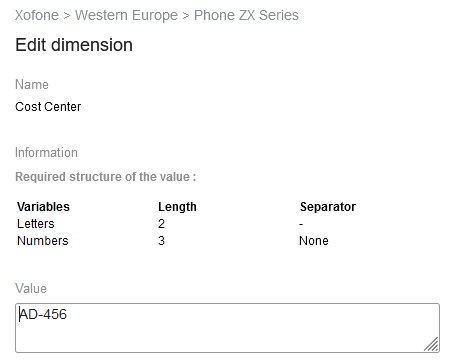
The screenshot shows a dimension where you have to enter text according to a specific rule. The defaults are displayed above the input field. Read the information where your administration may have entered some interesting information for you.

If you are to select a value in a dimension, a dropdown list is displayed. Click the desired value in the list. Read the information where your administration may have entered some interesting information for you.
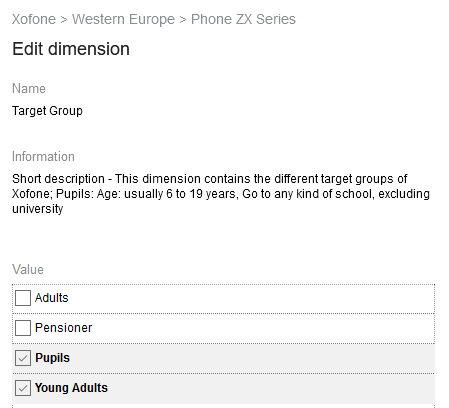
If you can select one or more values, the values are displayed in a list preceded with checkboxes. Activate the checkboxes of the values you want to select. Read the information where your administration may have entered some interesting information for you.
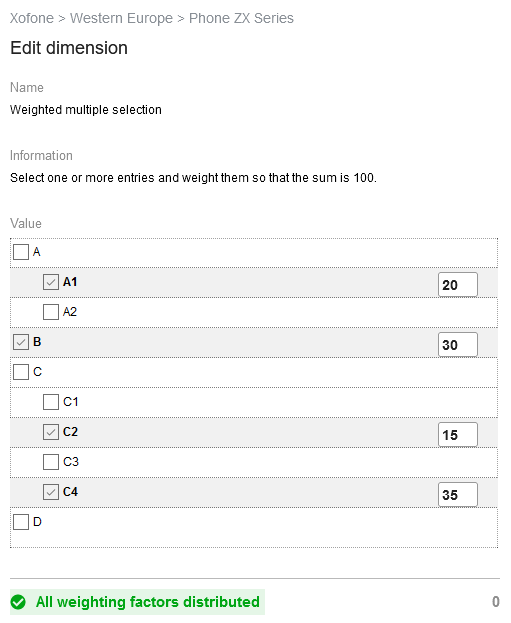
If you are to make a weighted selection, the values are displayed in a list preceded by a checkbox. If you activate a checkbox, an input field is additionally displayed at the end of the line. Enter numbers between 1 and 100 in the input field so that the sum of all numbers is exactly 100.
Read the information where your administration may have entered some interesting information for you.
-
Open the detailed view of the element in which you want to fill in a dimension.
-
Go to the Dimensions tab.
-
Select a dimension.
-
Click Edit.
-
Edit the dimension according to the type. Note the preceding sections in this chapter.
-
Click Save.
-
Choose X to close the detailed view.
The dimensions that you can access are listed.
You have filled the values for the selected dimension.